Get Started
What we will need here.
- Linux compatible development environment
- MacOS
- Linux
- WSL2 on Windows
- Git
- Node, NPM
- Google Account
- Firebase Command LIne (CLI) Tools
- Firebase Emulators
We will assume that the following tools have been installed in a suitable environent.
- Git
- Node Virtual Manager (NVM), Node, Node Package Manager (NPM)
And that we have a readily available Google account.
The steps we will need here are as follows.
1. Creating Firebase Project
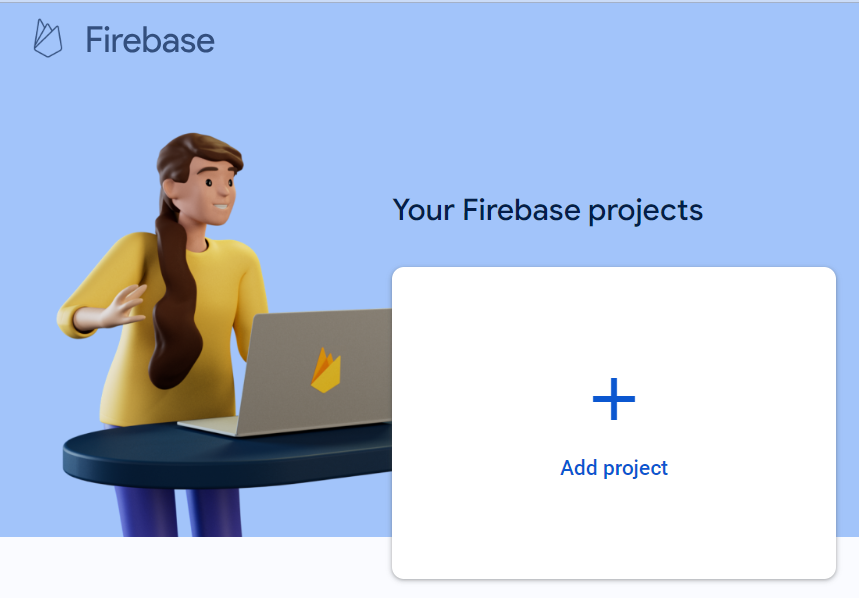
Create an empty Firebase project after we are logged in with Google at here, https://console.firebase.google.com/.
Take note of our YOUR PROJECT UNIQUE ID and YOUR PROJECT ID
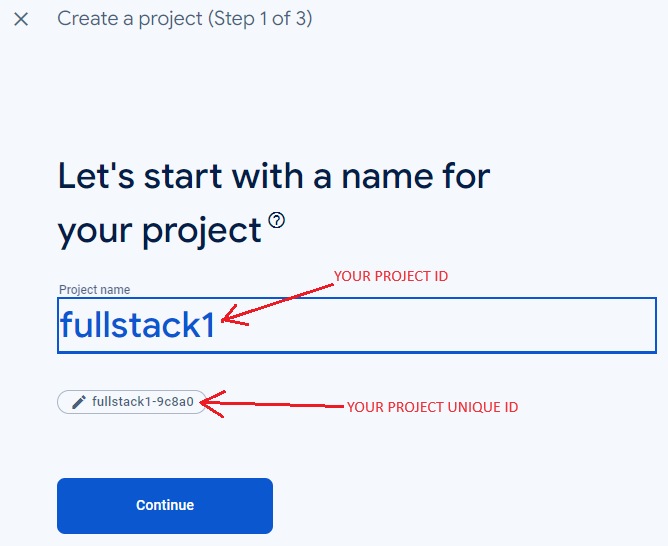
We will need them later when configuring our environment files.
The reason is that they are different is because it allows us to keep the project name as given so that it is relevant to us while the actual hosting ID is unique.
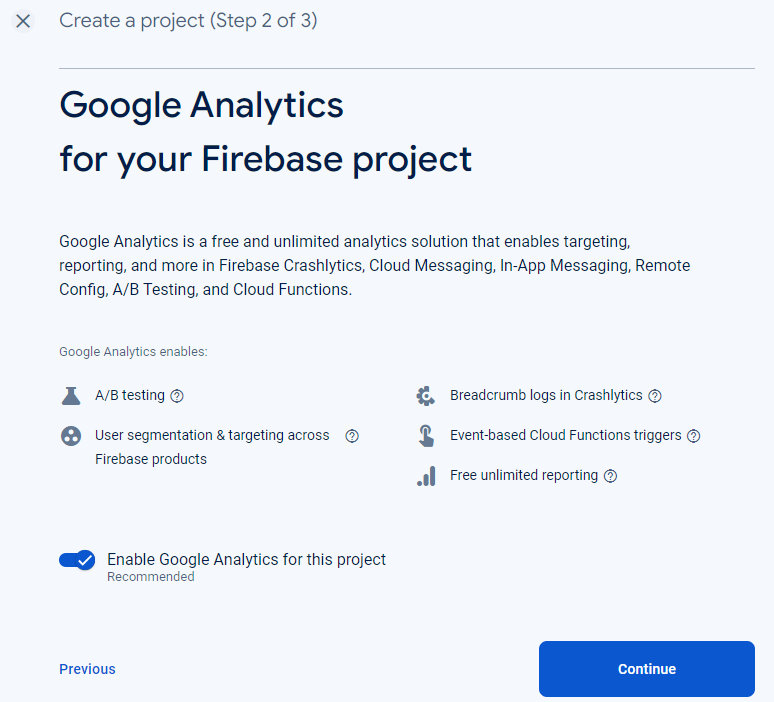
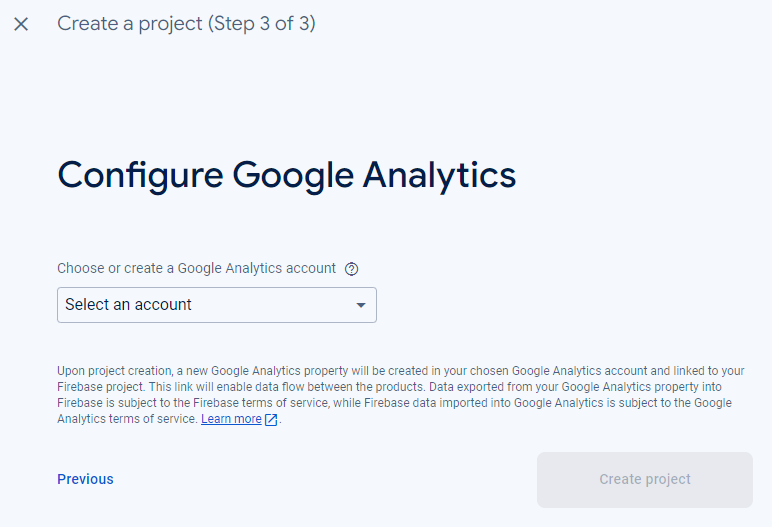
Configure up Google Analytics as we will use it eventually.
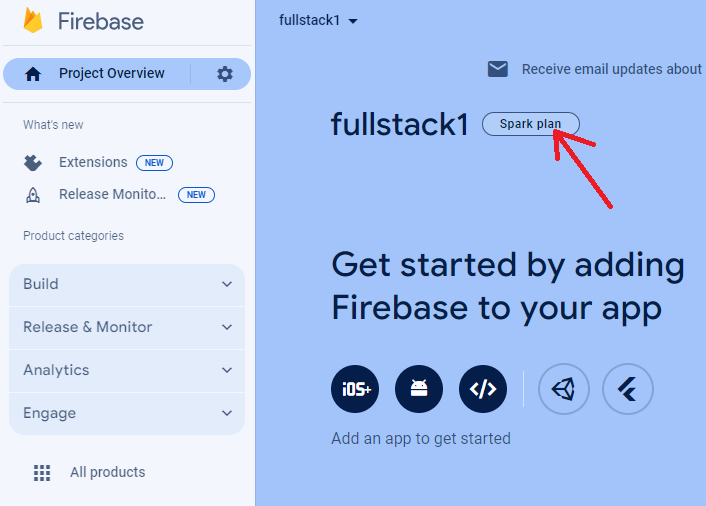
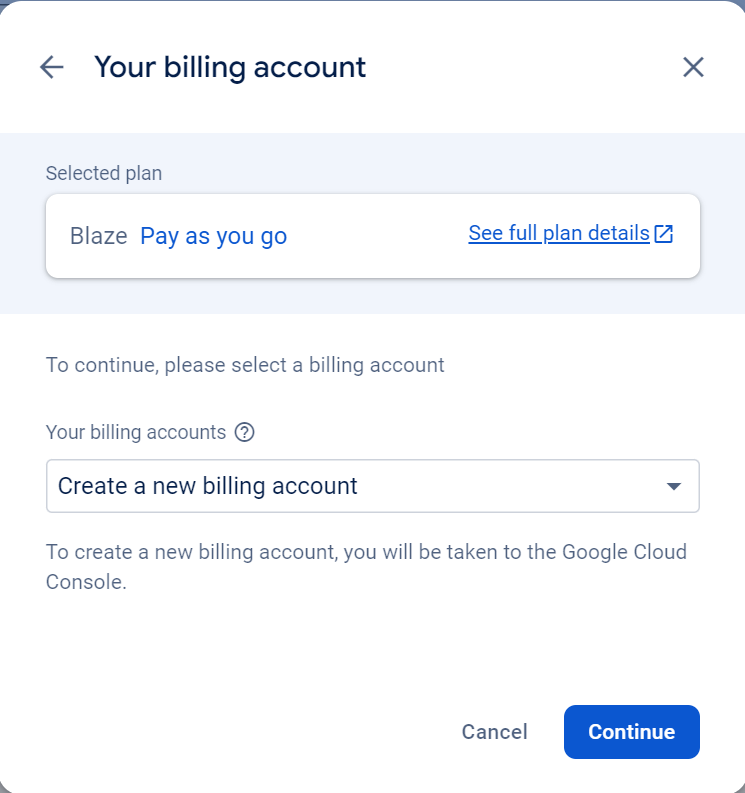
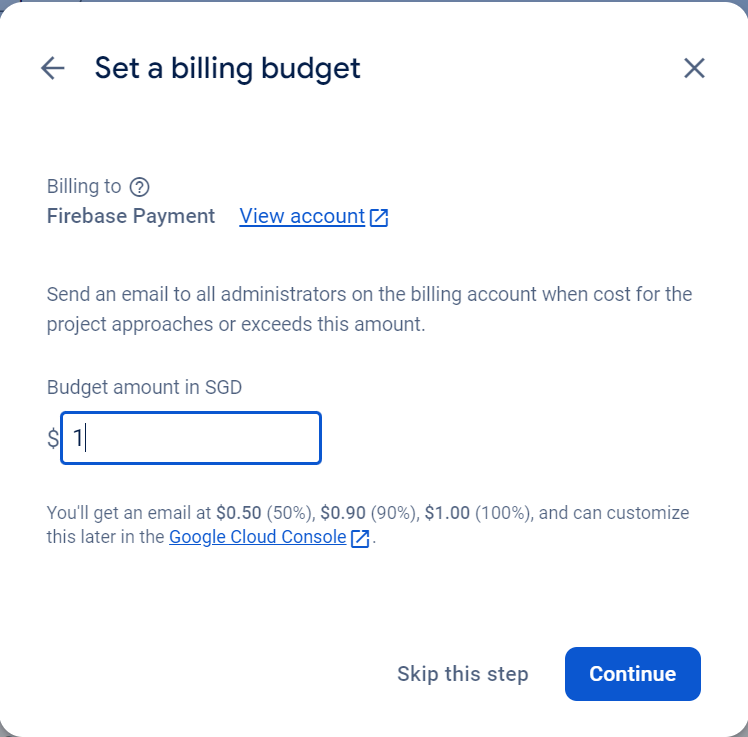
Upgrade to Blaze plan so that we can access wider range of APIs and features. We would not be billed if no premium features are used or quotas exceeded.
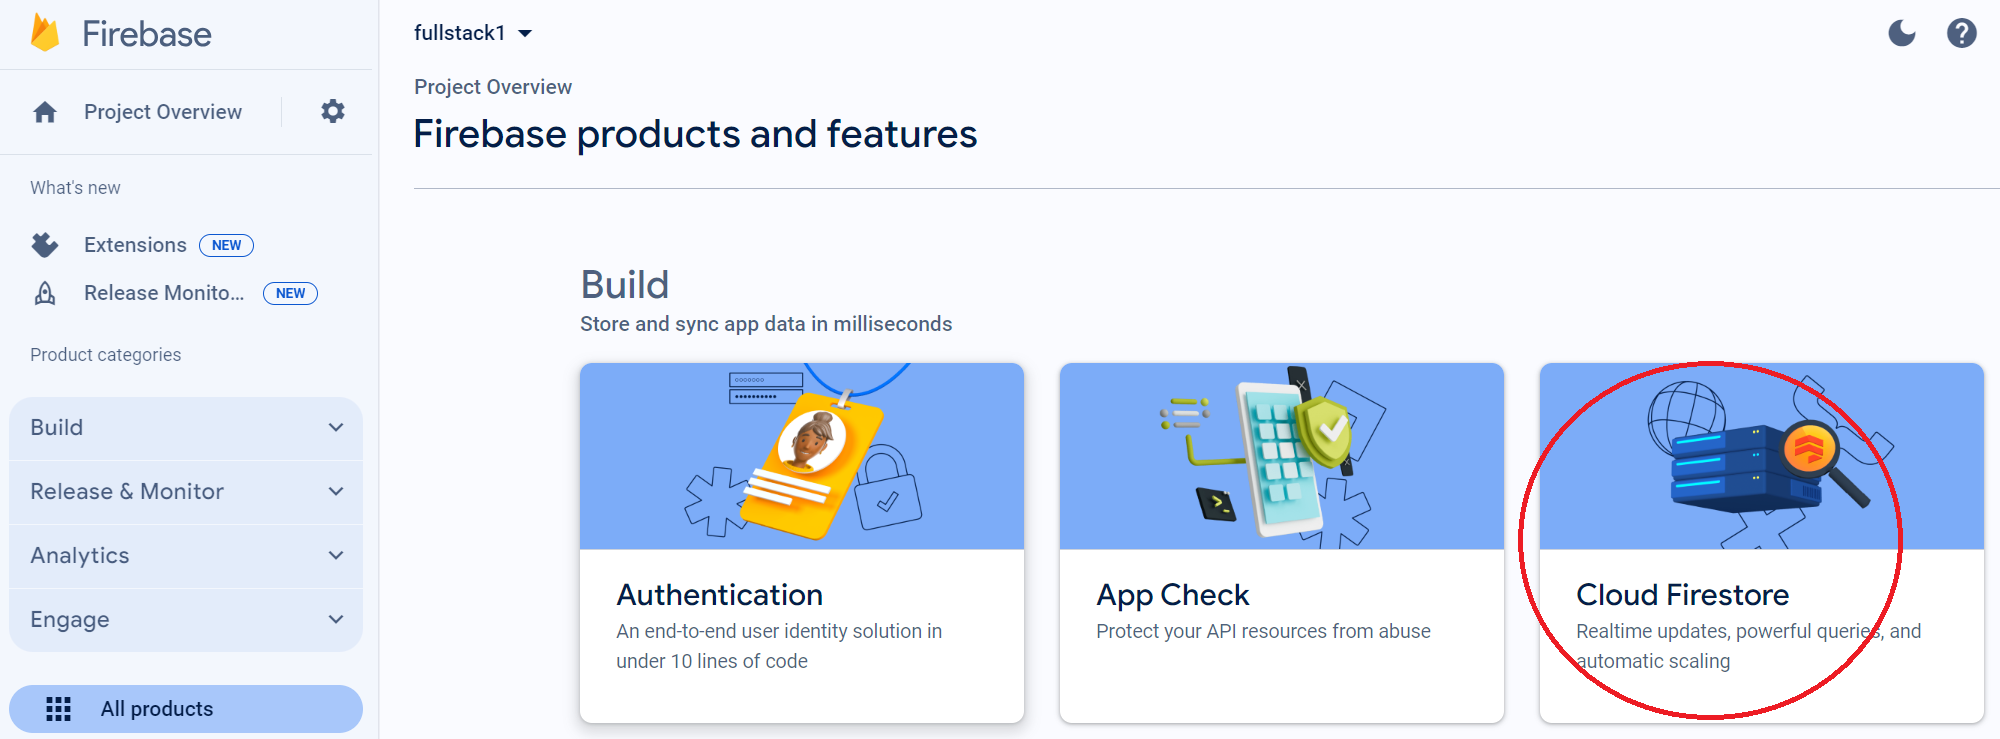
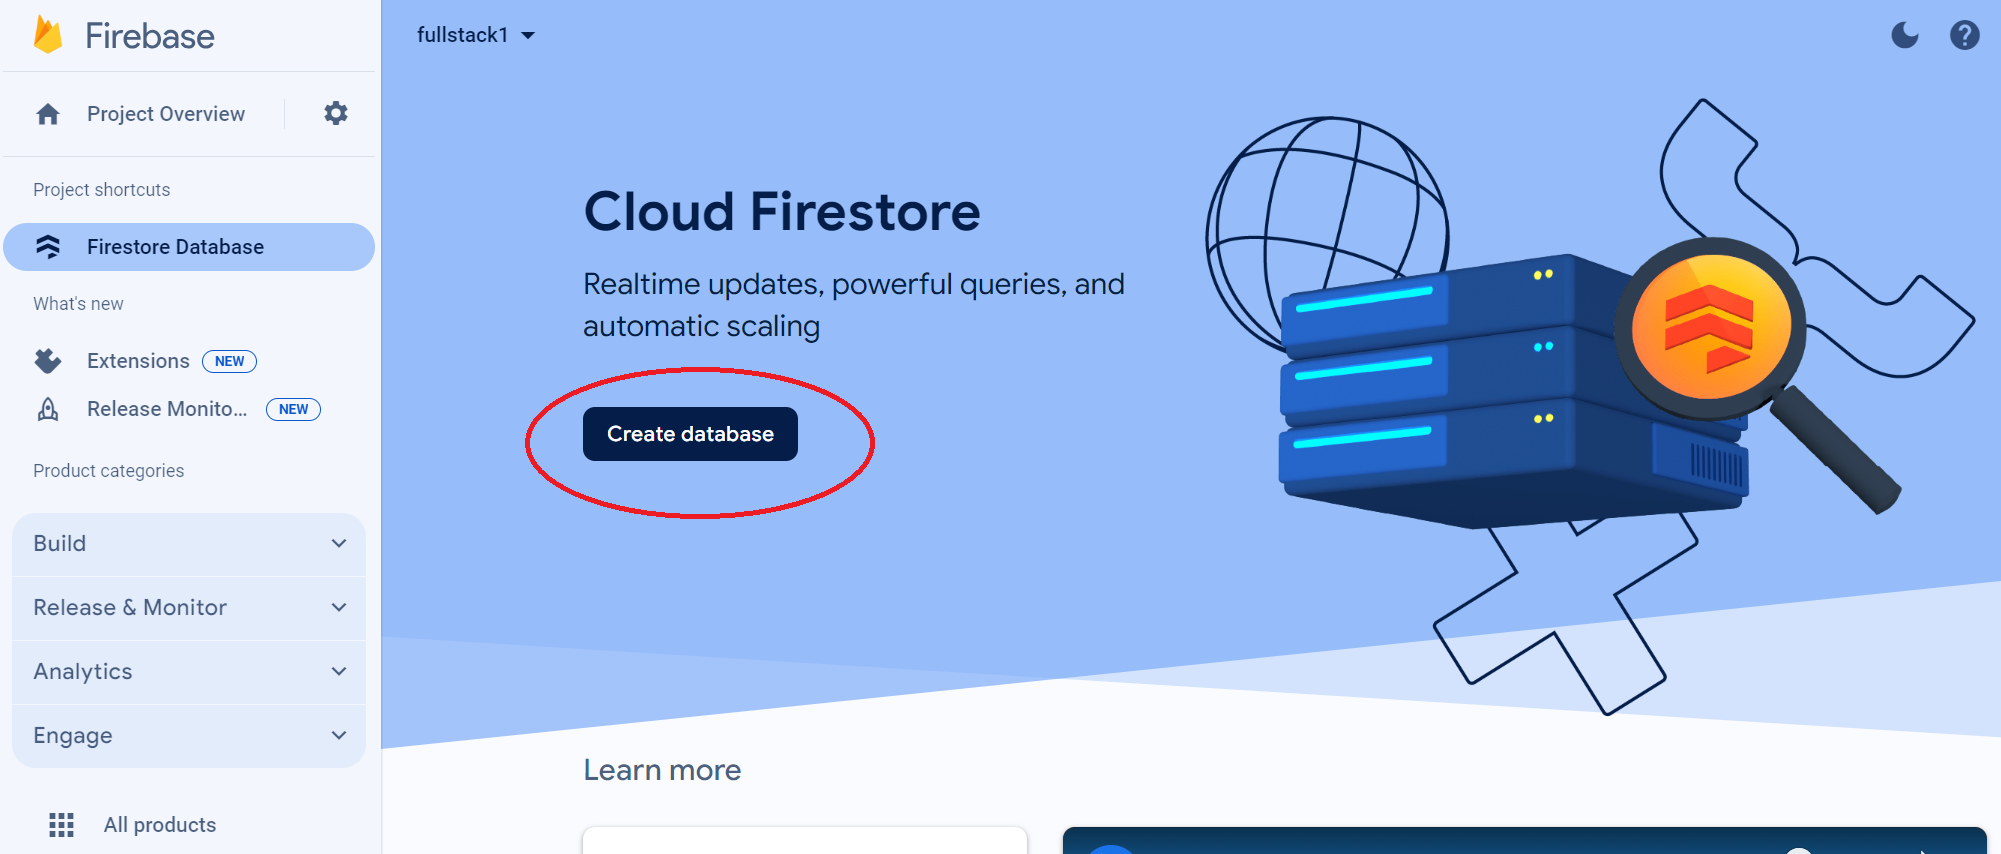
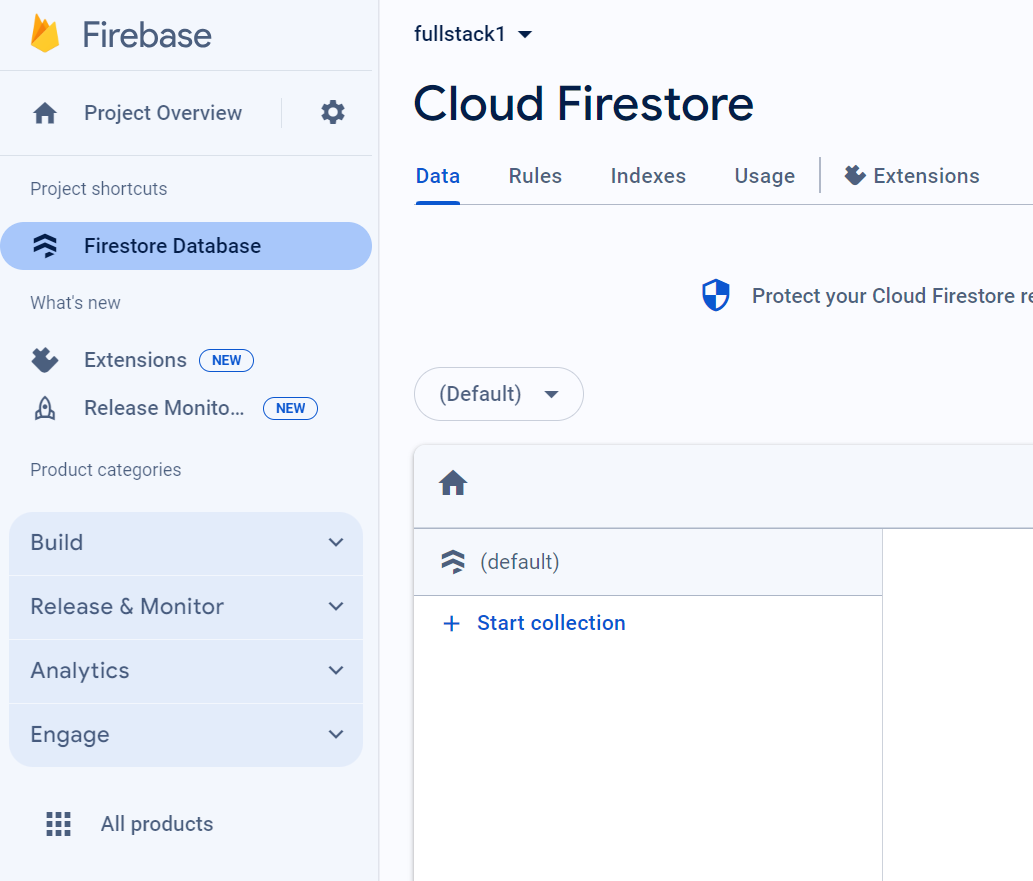
Creating an empty Firestore
We will need a Firestore database to store data at our backend server.
Step 1
Step 2
Step 3
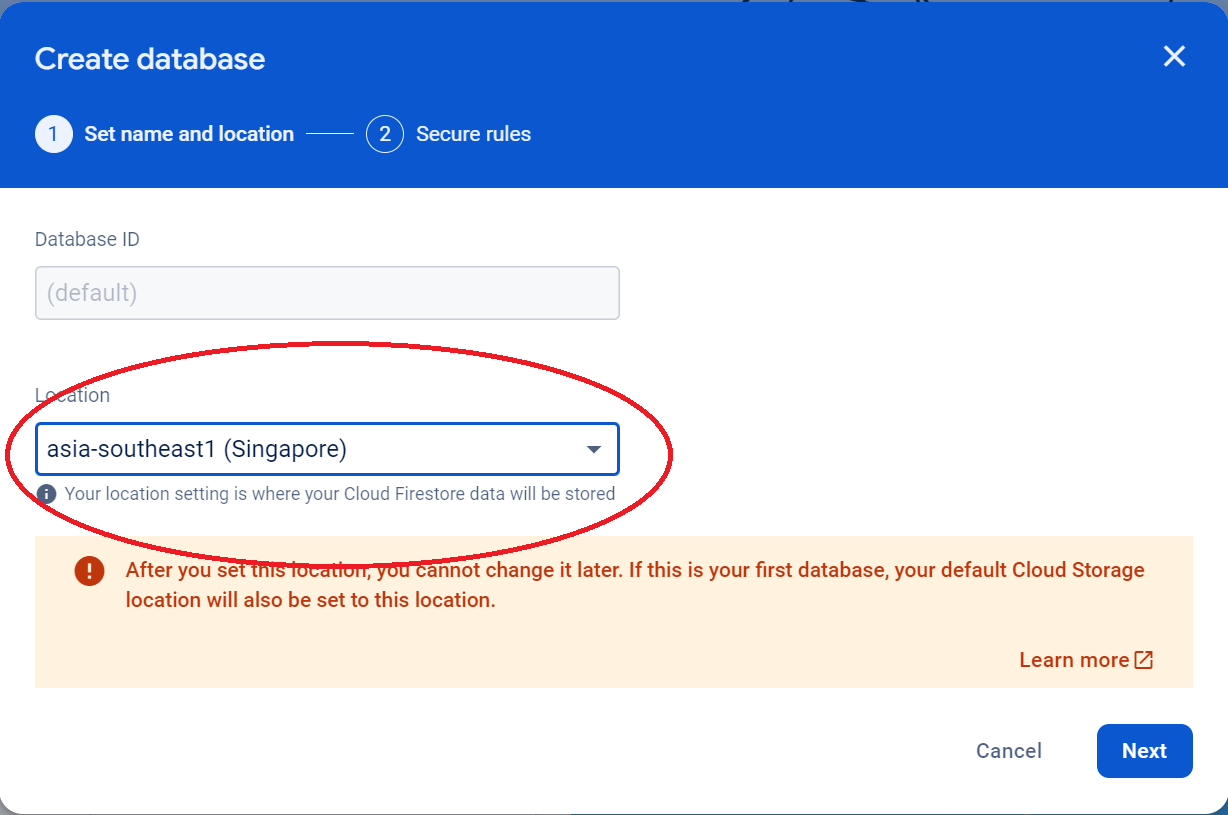
Final State
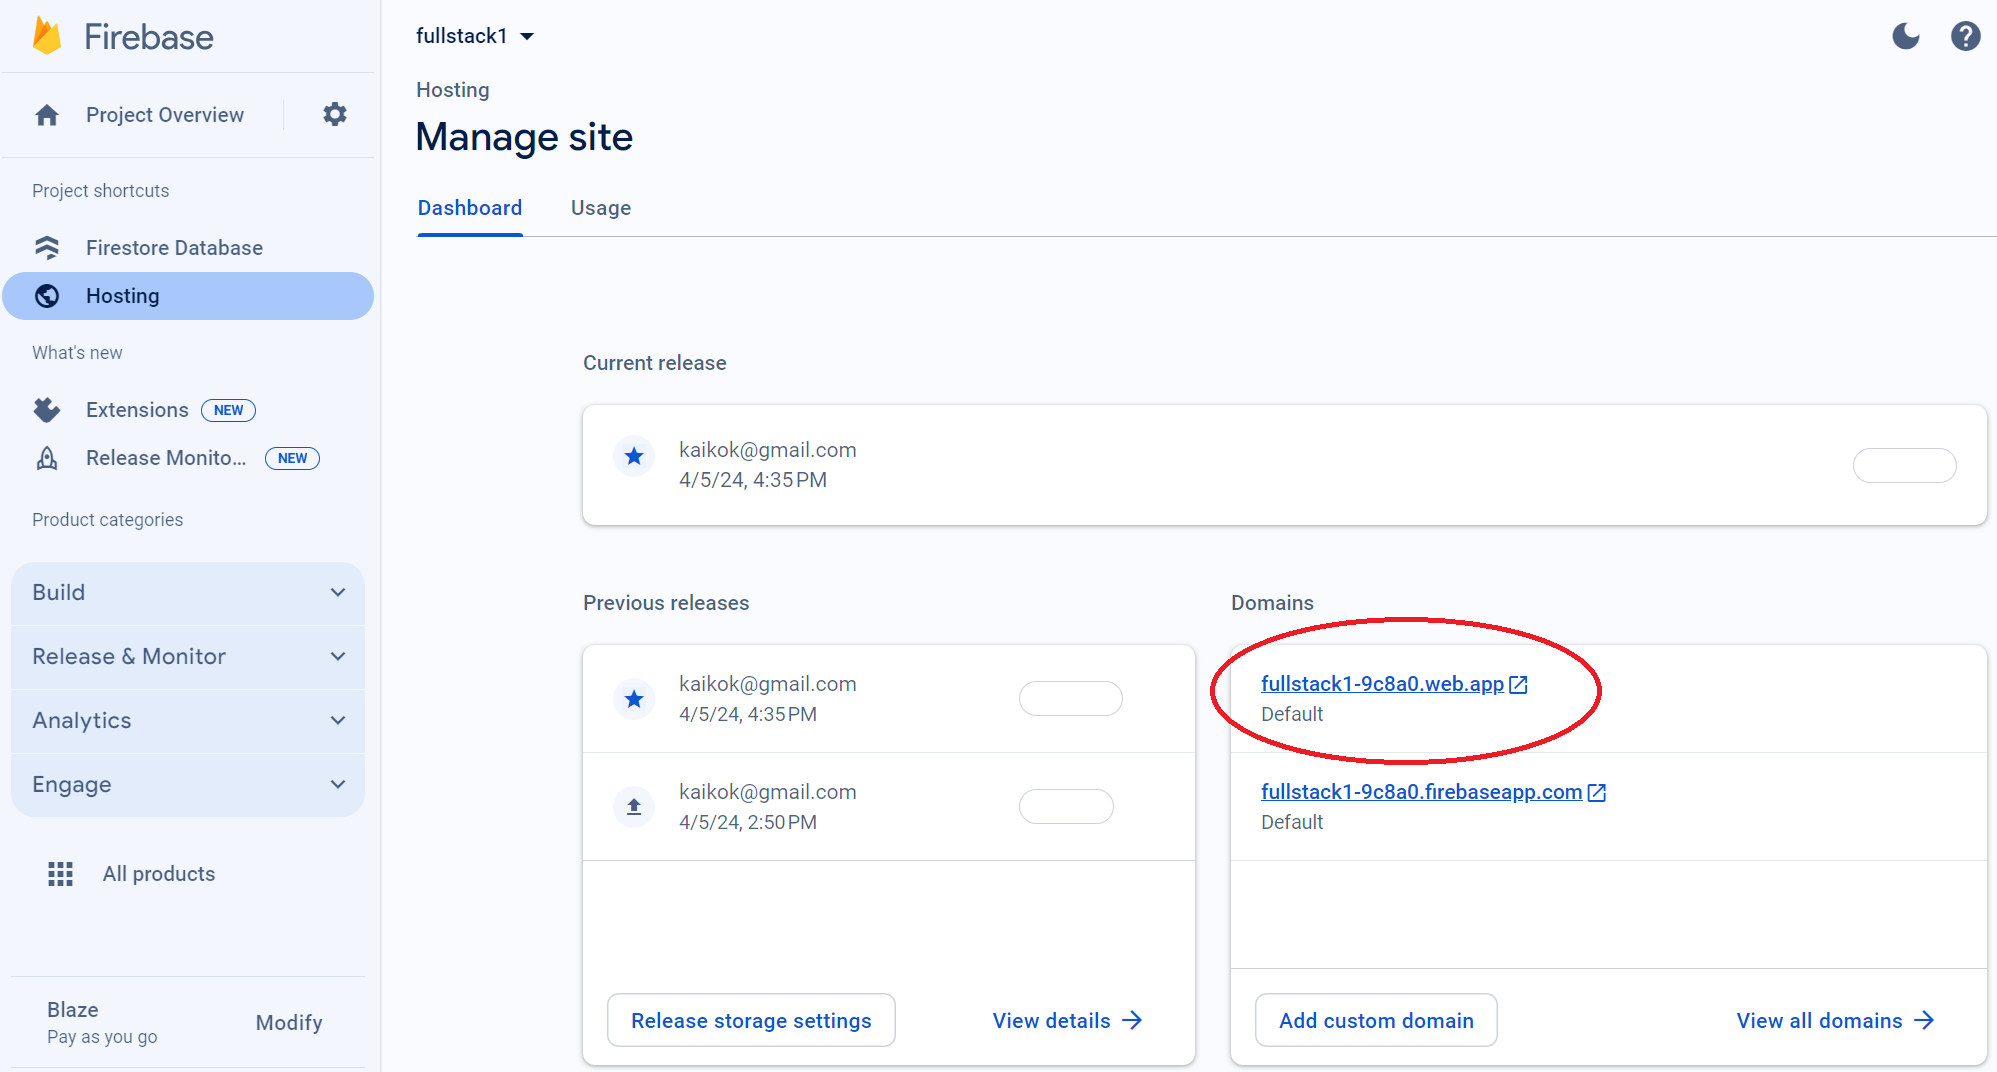
Creating Hosting
And a hosting environment for our frontend client.
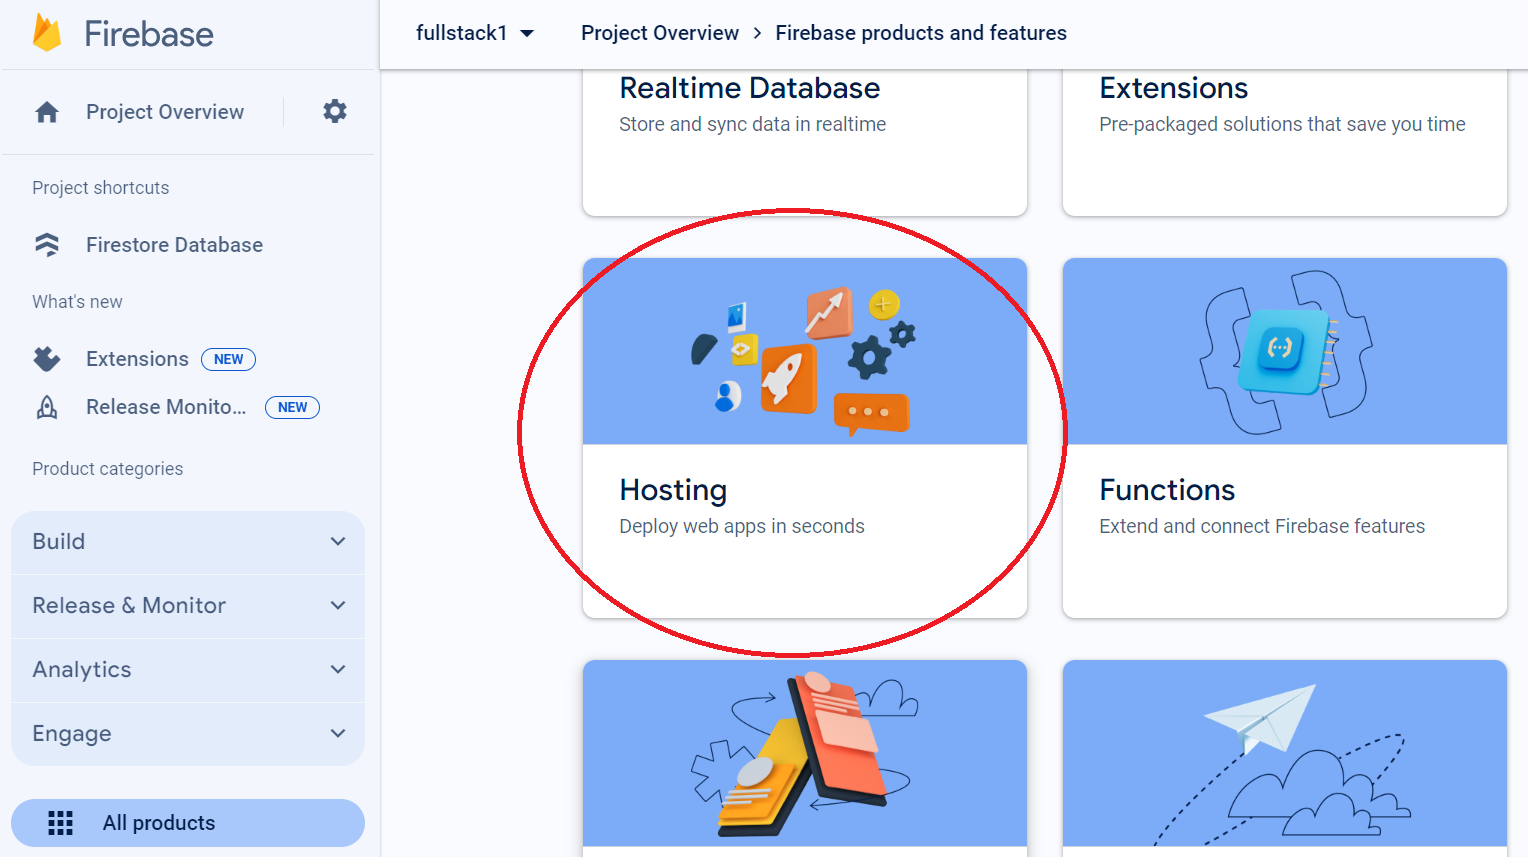
Final state
2. Installing Firebase Tool
Assuming NVM, Node, NPM have been installed. We will install Firebase Command LIne (CLI) tools globally.
~/fullstack$ npm install -g firebase-tools
Check if Firebase CLI tool has been installed properly.
~/fullstack$ firebase --version
13.7.1
~/fullstack$
Login to Firebase with Localhost.
Run the following command from the root of your project folder to login to Firebase.
~/fullstack$ firebase login
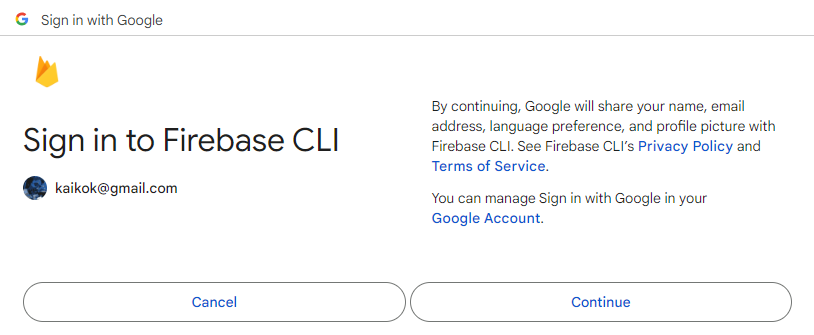
We will be provided with a link to login from your browser in the output.

Entering the link will bring us to the screen below. Choose your Google account.

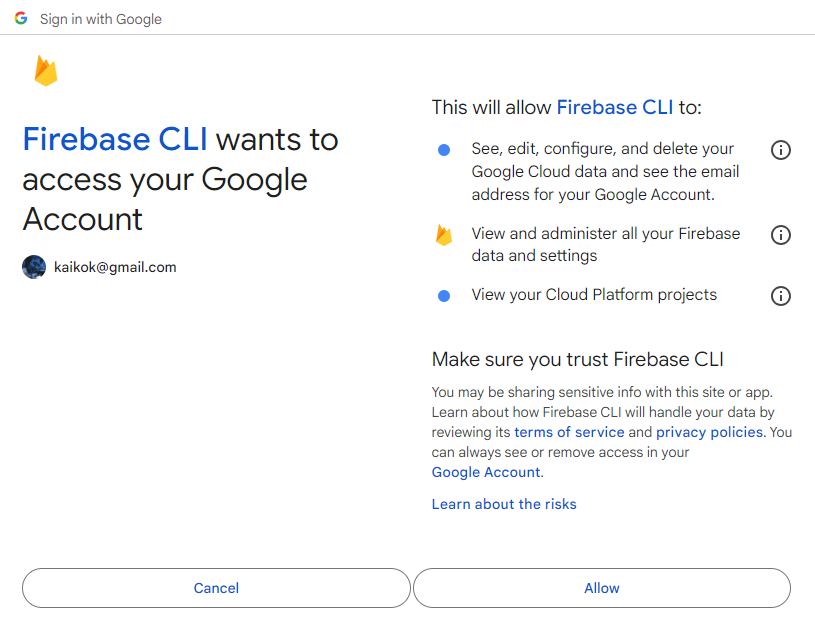
We will be prompted to accept Terms of Service.
We will need to grant the permissions to authorise the tool to operate on resources in our Firebase account.
Once granted, we will be shown a success prompt.
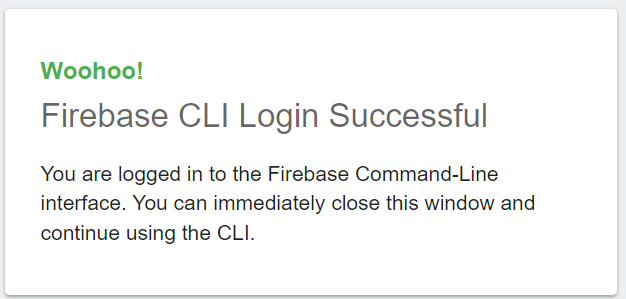
The terminal will reflect the similar success message.

Login to Firebase without Localhost.
This happens when we are using a remote server or a container where it's localhost is not exposed on our development machine. After authentication and authorisation with Google OAuth server, we cannot redirect back to the tool with the token.
Use the following command instead.
firebase login --no-localhost
root@25550116b3bb:/home/fullstack# firebase login --no-localhost
i  Firebase optionally collects CLI and Emulator Suite usage and error reporting information to help improve our products. Data is collected in accordance with Google's privacy policy (https://policies.google.com/privacy) and is not used to identify you.

? Allow Firebase to collect CLI and Emulator Suite usage and error reporting information? No

To sign in to the Firebase CLI:

1. Take note of your session ID:

   36194

2. Visit the URL below on any device and follow the instructions to get your code:

   https://auth.firebase.tools/login?code_challenge=yRpzKiJqepZkUy3Jgq3oLwes-hrDsLVHGd5eeuQw3mw&session=361948e7-6914-4c9d-a6e3-96fcb5580b1a&attest=zbiGrYiZYoGlWq4VC4bmDt3AOUEUsftYz5LANyouVes

3. Paste or enter the authorization code below once we have it:

? Enter authorization code:
3. Using Firebase Emulator
In our Minimal Viable Product (MVP), we will be using Firebase Emulator to support local development. To use the Emulator, we will need to tie it to a Firebase project.
Linking to our Firebase project
Clone the repository to our local environment.
git clone git@gitlab.com:kaikokchew/fullstack.git
cd fullstack
ls -la
~/fullstack$ ls -la
total 76
drwxr-xr-x  7 user user  4096 Apr  8 15:52 .
drwxr-xr-x 63 user user  4096 Apr  4 16:23 ..
drwxr-xr-x  2 user user  4096 Apr  5 14:49 .firebase
-rw-r--r--  1 user user   280 Apr  5 14:54 .firebaserc
drwxr-xr-x  7 user user  4096 Apr  7 22:37 .git
-rw-r--r--  1 user user  1207 Apr  5 14:43 .gitignore
-rw-r--r--  1 user user  1069 Apr  8 15:52 LICENSE
-rw-r--r--  1 user user 22563 Apr  8 15:51 README.md
drwxr-xr-x  2 user user  4096 Apr  8 15:51 docs
-rw-r--r--  1 user user  1323 Apr  4 16:26 firebase.json
-rw-r--r--  1 user user    44 Apr  4 16:26 firestore.indexes.json
-rw-r--r--  1 user user   163 Apr  4 16:26 firestore.rules
drwxr-xr-x  7 user user  4096 Apr  8 12:16 frontend
drwxr-xr-x  5 user user  4096 Apr  5 14:42 functions
~/fullstack$
Open and edit the firebase.json file and replace the placeholders with YOUR PROJECT UNIQUE ID.
{
  "projects": {
    "default": "<YOUR PROJECT UNIQUE ID>"
  },
  "targets": {
    "<YOUR PROJECT UNIQUE ID>": {
      "hosting": {
        "production": [
          "<YOUR PROJECT UNIQUE ID>"
        ],
        "emulator": [
          "<YOUR PROJECT UNIQUE ID>-emu"
        ]
      }
    }
  },
  "etags": {}
}
Environment Variables
The following are to be configured before we start.
Frontend Client
.env.emulator
VITE_SESSION_SERVICE_URL=http://127.0.0.1:5000/api/resources/session
VITE_LOGIN_URL=http://127.0.0.1:5000/api/auth/google
VITE_LOGOUT_URL=http://127.0.0.1:5000/api/resources/logout

VITE_USE_MOCK=true
VITE_MOCK_LOGIN_URL=http://127.0.0.1:5000/api/auth/mock

VITE_WEBAPP_NAME="<YOUR PROJECT NAME>"
Backend API Server
.env.local
PROJECT_ID=<YOUR PROJECT ID>

GOOGLE_SIGN_IN_CLIENT_ID=""
GOOGLE_SIGN_IN_CLIENT_SECRET=""
GOOGLE_SIGN_IN_REDIRECT_URI=http://127.0.0.1:5000/api/resources/google/callback

MODE=emulator
FIRESTORE_EMULATOR_HOST=localhost:8080

USE_MOCK=true
BASE_URL=http://127.0.0.1:5000/api
MAINPAGE_URL=http://127.0.0.1:5000
Building the application
The following steps install the dependencies for our software and build a first transpiled code for deployment to the emulator.
Backend API Server
Do the following to install dependencies.
cd functions
npm install
Output of installation.
added 720 packages, and audited 721 packages in 11s

127 packages are looking for funding
  run `npm fund` for details

found 0 vulnerabilities
~/fullstack/functions $
To build the backend server.
npm run build
cd ..
Output of build.
> build
> tsc

~/fullstack/functions$ cd ..
~/fullstack$
Frontend Client
Do the following to install dependencies.
cd frontend
npm install
Output of installation.
added 275 packages, and audited 276 packages in 7s

45 packages are looking for funding
  run `npm fund` for details

found 0 vulnerabilities

~/fullstack/frontend $
Build the frontend client.
npm run build
cd ..
Output of build.
> frontend@0.0.0 build
> tsc && vite build --outDir prod

vite v5.2.2 building for production...
✓ 412 modules transformed.
prod/index.html                   0.46 kB │ gzip:  0.30 kB
prod/assets/index-CheykCXC.css  233.54 kB │ gzip: 31.77 kB
prod/assets/index-BNQj4NIX.js   274.87 kB │ gzip: 91.67 kB
✓ built in 2.40s

~/fullstack/frontend $ cd ..
~/fullstack $
Installing the Emulator
Install the emulator using the firebase CLI tool.
~/fullstack $ firebase init
And choose the emulators option.
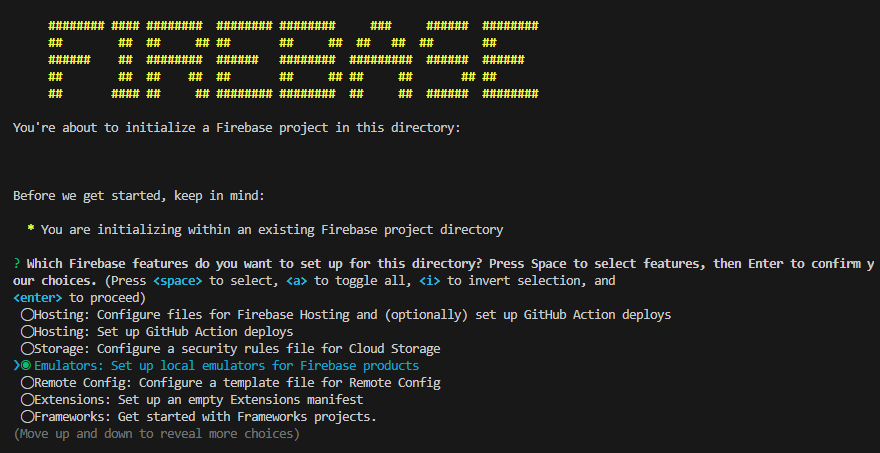
And then choose the following emulators
- Functions
- Firestore
- Hosting
Once installed, we can start it with the following command.
firebase emulators:start
We should see the following output.
i emulators: Starting emulators: functions, firestore, hosting
⚠ functions: The following emulators are not running, calls to these services from the Functions emulator will affect production: auth, database, pubsub, storage
i firestore: Firestore Emulator logging to firestore-debug.log
✔ firestore: Firestore Emulator UI websocket is running on 9150.
i hosting[emulator]: Serving hosting files from: frontend/dist
✔ hosting[emulator]: Local server: http://127.0.0.1:5000
i hosting[production]: Serving hosting files from: frontend/prod
✔ hosting[production]: Local server: http://127.0.0.1:5005
i ui: Emulator UI logging to ui-debug.log
i functions: Watching "/home/user/fullstack1/functions" for Cloud Functions...
✔ functions: Using node@18 from host.
i functions: Loaded environment variables from .env, .env.local.
Serving at port 8804
✔ functions: Loaded functions definitions from source: api.
✔ functions[us-central1-api]: http function initialized (http://127.0.0.1:5001/YOUR_PROJECT_ID/us-central1/api).
┌─────────────────────────────────────────────────────────────┐
│ ✔ All emulators ready! It is now safe to connect your app. │
│ i View Emulator UI at http://127.0.0.1:4000/ │
└─────────────────────────────────────────────────────────────┘
┌───────────┬────────────────┬─────────────────────────────────┐
│ Emulator │ Host:Port │ View in Emulator UI │
├───────────┼─────��───────────┼─────────────────────────────────┤
│ Functions │ 127.0.0.1:5001 │ http://127.0.0.1:4000/functions │
├───────────┼────────────────┼─────────────────────────────────┤
│ Firestore │ 127.0.0.1:8080 │ http://127.0.0.1:4000/firestore │
├───────────┼────────────────┼─────────────────────────────────┤
│ Hosting │ 127.0.0.1:5000 │ n/a │
└───────────┴────────────────┴─────────────────────────────────┘
Emulator Hub running at 127.0.0.1:4400
Other reserved ports: 4500, 9150, 5005
Issues? Report them at https://github.com/firebase/firebase-tools/issues and attach the *-debug.log files.
The following services are available.
| SNO | Address | Description |
|---|---|---|
| 1 | http://127.0.0.1:4000/ | Emulator Main Console |
| 2 | http://127.0.0.1:4000/functions | Cloud Function Logs |
| 3 | http://127.0.0.1:4000/firestore | GUI console |
| 4 | http://127.0.0.1:5000 | Frontend Web App hosting and API reverse proxy |
| 5 | http://127.0.0.1:5005 | Production build Web App hosting. *Not used for emulation. |
| 6 | http://127.0.0.1:5001 | Backend API server. API should be accessed through reverse proxy instead. |
* avoids collision of 2 builds when working on both remote and local environment.
Note that to reload environment variables for backend, the cloud function emulator need to be restarted.
Reset/Seeding Data
Reset firestore
curl http://127.0.0.1:5000/api/dbreset
Seeding firestore
curl http://127.0.0.1:5000/api/dbseed
Testing the Environment
For the backend API server.
curl http://127.0.0.1:5000/api/hello
It should repond with an output.
~/fullstack$ curl http://127.0.0.1:5000/api/hello
Hello, Firebase! emulator
Visit the frontend app at local server, http://127.0.0.1:5000.
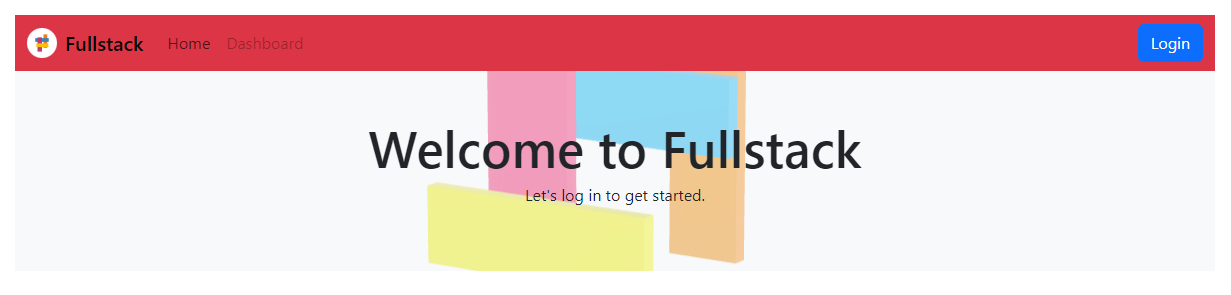
Notice that for emulation, the navbar banner color is changed to red to provide visual cue on the environment.